Dated but OK content
The signup process for an Amazon KDP has not changed much over the years. Adding a book is also similar, although book categories are a constant moving feast with Amazon.
In this chapter, I will show you how to publish your books on Amazon.
To publish books on Amazon, you need to set up a KDP account. KDP stands for Kindle Direct Publishing, which in the early days, was where independent authors could self-publish direct to the Kindle platform.
Now that CreateSpace and Kindle have merged, KDP is your all-in-one platform for publishing eBooks for Kindle and publishing paperbacks on Amazon and for distribution to bookstores.
Set up KDP Account
To set up your KDP account, go to the KDP website. You can search for “KDP” or enter “https://kdp.com” in the address bar of your browser.
You have two options when creating a KDP account:
- Use your existing Amazon account; or
- Create a new one for KDP.
It’s up to you which way you go—if you create a new KDP account, you can keep everything related to your writing business separate to your personal stuff. But you might not want two Amazon logins, so in this case, it would be better for you to use your Amazon account.
I have always regretted not setting up a separate account because when you are in the business of being a writer, a lot of your Amazon purchases are tax deductible. It’s a pain keeping legitimate business expenses separate from personal purchases when they’re all in the same account. Every country is different, and you will have different needs, so your experience may be different from mine.
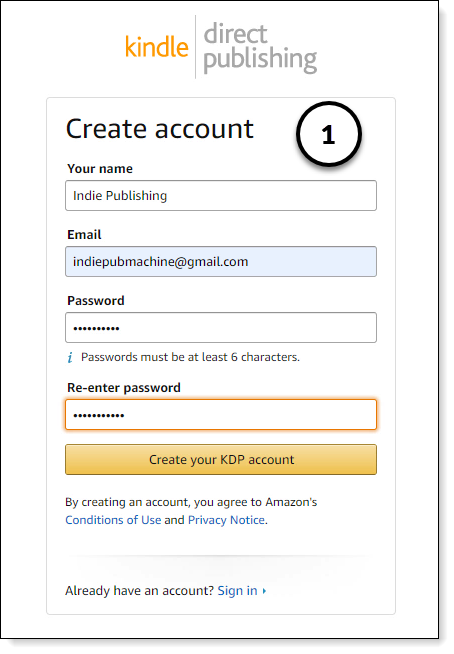
So you can see the complete process, I will set up a new account:
- Enter your name, email, and a password and KDP will send a verification code to your email. Once you verify the code and accept the terms and conditions, your KDP dashboard will open in your browser.
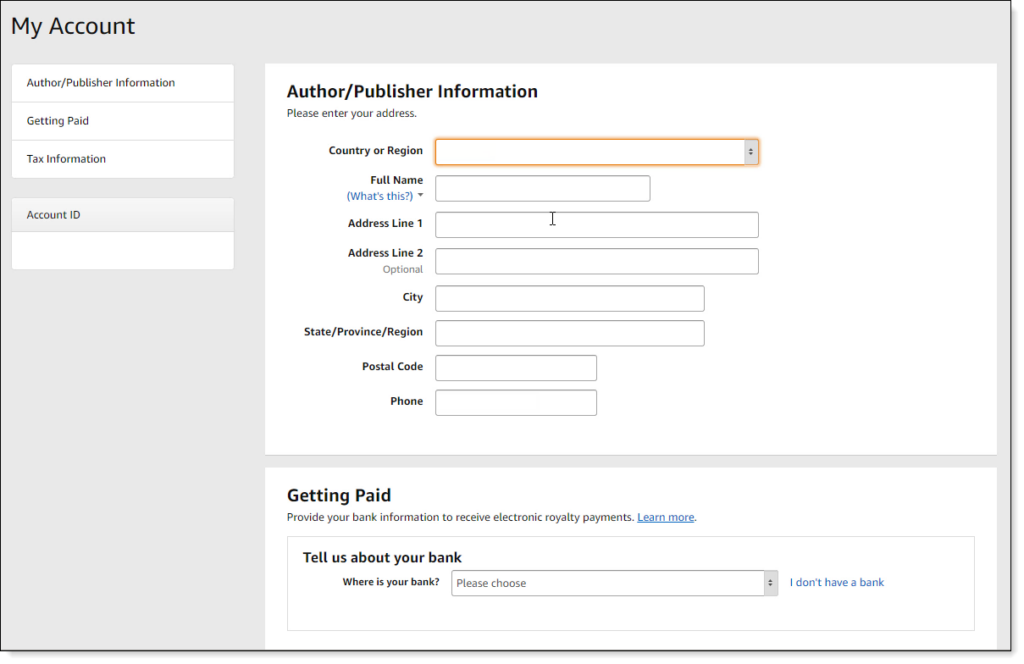
- Before you can publish a book, you must enter additional account information. Click on “Update Now” at the top of your dashboard.

- Enter your address, contact information and your bank account details. Depending on which country you are in, Amazon pays either into your bank account by electronic funds transfer, or by wire transfer. Amazon has country-specific arrangements and restrictions for payments, so you must check the rules for your country; I can’t give you any specific advice.
- Finally, you need to complete the tax interview. The tax interview determines how much tax Amazon will withhold from your royalties on behalf of the IRS. This is another thing I can’t advise you on, but in broad terms, the tax Amazon deducts from your payments varies from country to country. You need to complete the tax interview to ensure Amazon deducts the right amount of tax.
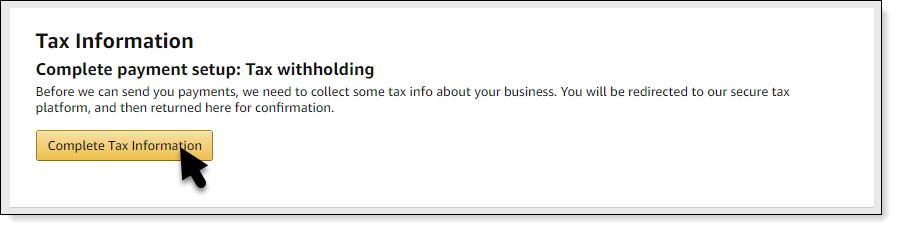
Once you have finished entering your banking and tax information, the warning at the top of your dashboard will disappear, and you will be ready to publish your books.
Add a Book
I assume that you have an eBook file formatted for Kindle, and you have a cover design ready to upload. If you don’t, you need to have them ready before continuing.
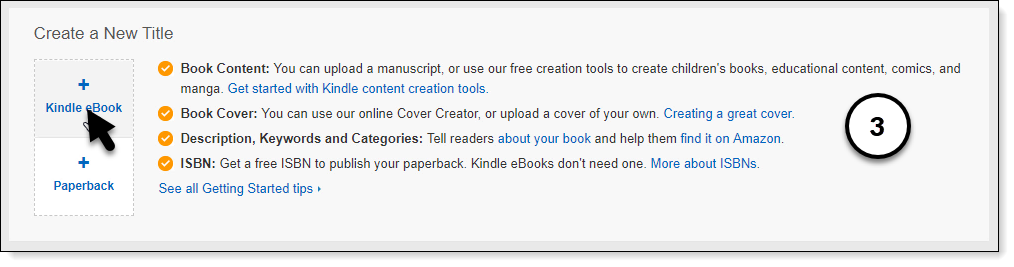
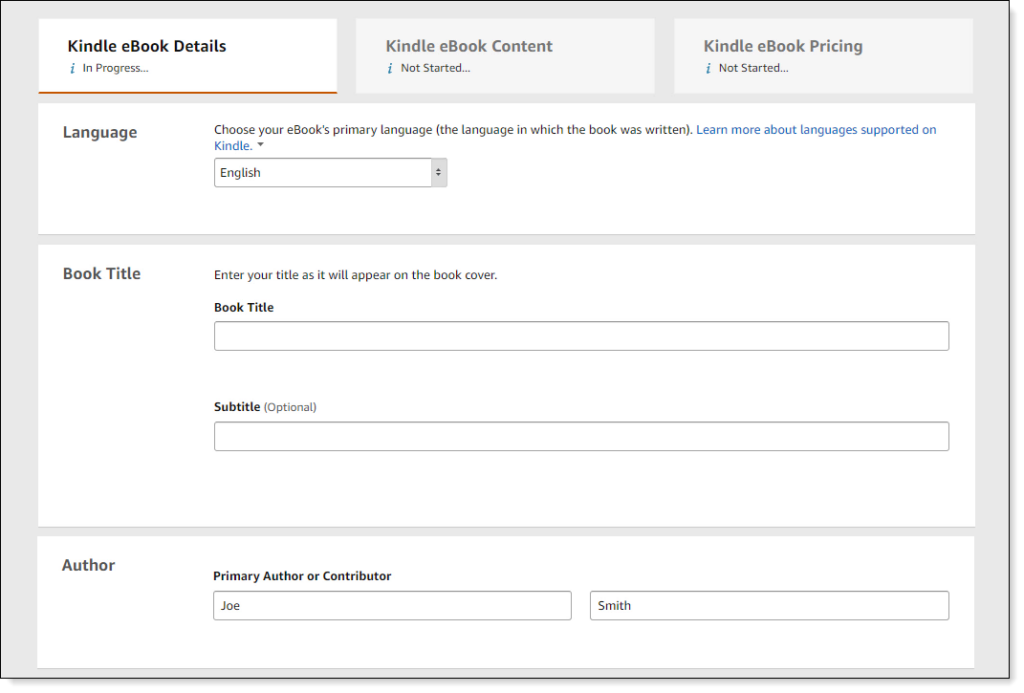
- First, log in to your KDP account and click on the create a Kindle eBook icon. The process for creating eBooks and paperbacks is the same, so I will only show you how to publish an eBook in this chapter.
- Enter your book title and author name.
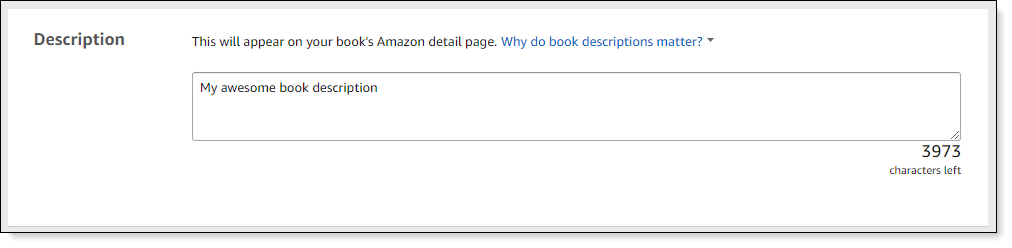
- Enter a book description. This is often the same as your back cover blurb but can be anything that describes your book. Just remember the book description is one of the critical elements that will help your book sell, so if you are not good at copywriting, you need to hire a professional to do this for you.
- Click the I own the copyright… button.

Keywords and Categories
Next, we need to select keywords and Amazon categories for your book.
While Amazon says keywords are optional, they’re not—if you want your book to be searchable, you need keywords.
Amazon has some advice on picking keywords, but my favorite technique is to use Amazon’s auto-suggest tool to help you find good keywords and keyphrases.
Let’s say Joe Smith is ready to publish his latest cyberpunk dystopian romance. To find some useful keywords, go to Amazon’s home page and start typing in a broad keyword. In this example, I’m entering “cyberpunk”.
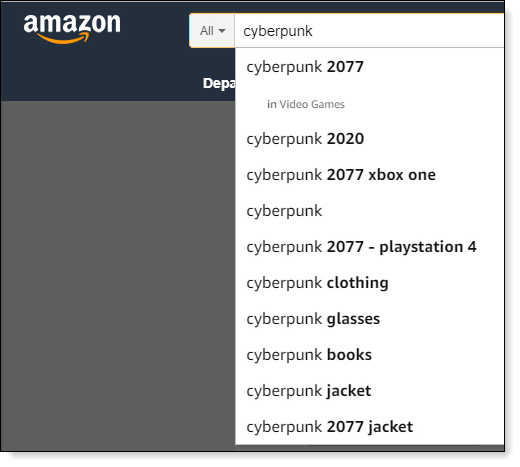
You can see from the screenshot that Amazon is suggesting search terms for you. The beauty of this technique is auto-suggest isn’t making these terms up—these are actual search terms used by readers; listed in order of relative importance.
In this example, most people are searching for “Cyberpunk 2077” (which is a game, in case you’re wondering) with Cyberpunk books coming in the top 10.
To get related keywords and phrases, you use a simple trick called the “alphabet soup” method. Type in your main keyword and then type the letter a:

In this screenshot, you can see “cyberpunk anthology” is a potential candidate for a keyphrase. Repeat the process with “cyberpunk b” and work your way through the alphabet to collect useful keywords and phrases.
You should complete this exercise with two or more primary keywords; for example, Joe could also use “dystopia” and “romance” as additional primary keywords.
Amazon allows up to seven keywords and phrases. Once you have a reasonable number of potential keywords and phrases, select seven of your favorites.
Don’t throw out the rest of your list though—you can use these extra keywords and phrases later for other books in the same genre, or on your website for Search Engine Optimization (SEO).
Next, we need to find some categories for the book.
The best way to find book categories is to look at other books similar to yours. You can search for books if you know the title or author, or you can browse the best-seller lists for books like yours.
You can also do a broad search, which is what I’m doing in this example:
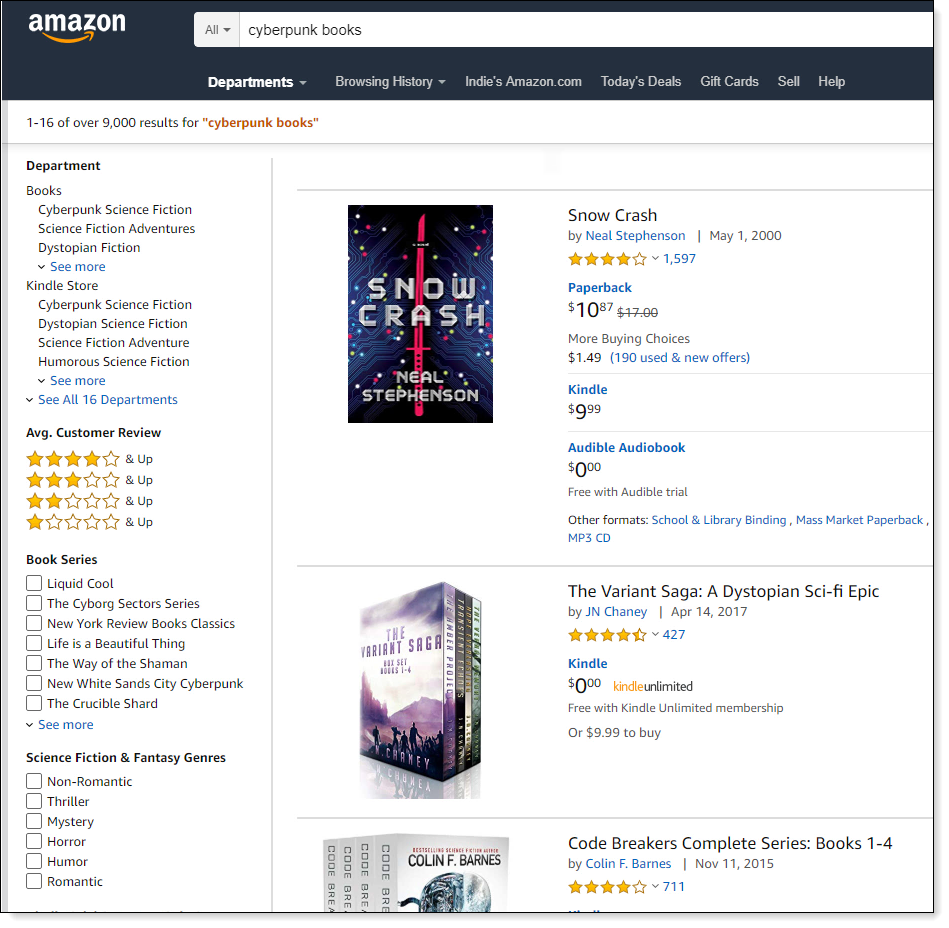
You can see from the screenshot I have searched for “cyberpunk books”.
Whichever method you use, the book’s categories are listed in the “Product Details” section on the book’s page on Amazon.
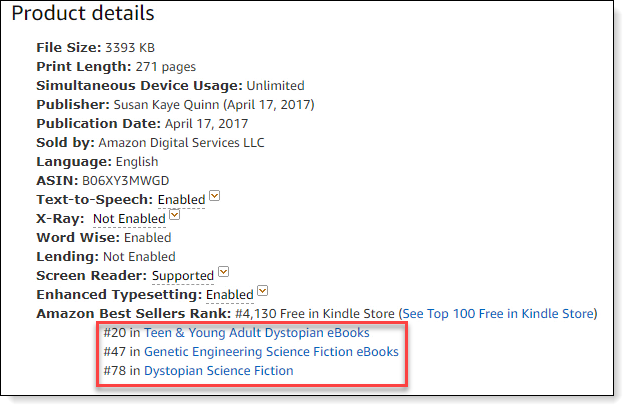
Repeat the process until you have 3 or more categories you can use.
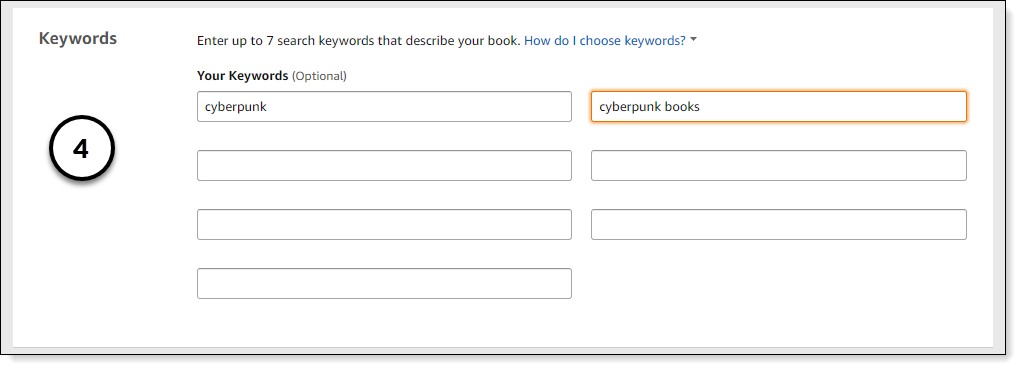
- Switch back to your KDP account and add the keywords and phrases from your research.
- Once you have added your keywords and key phrases, click the Set Categories button to search for categories that match the books you found in your research. Now comes the frustrating part. Not only will you find similar categories listed in multiple sections, but the categories often don’t match with the categories you selected.
- The aim is to select a category that is as close as possible. Don’t worry too much about picking the right categories first go as they’re easy to change later. I am going to the “Fiction” category and selecting “Science Fiction > Genetic Engineering” as my first category and “Dystopian” as my second.
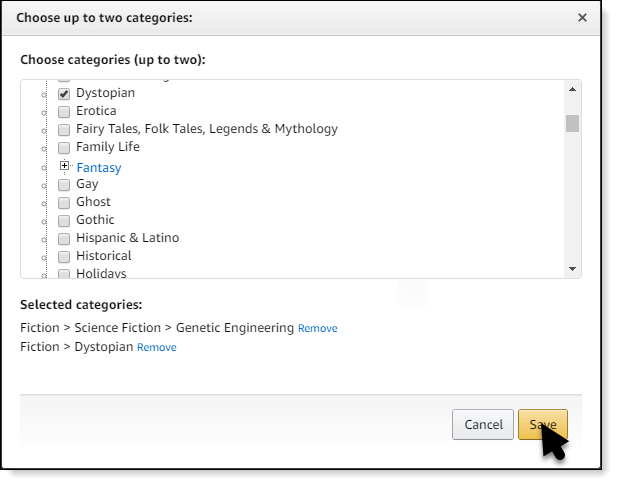
- You only get to pick two categories. Once they’re selected, click Save.
- Moving down the form, you can select age and US grade ranges for your book, although I leave these alone.
- Once you’ve completed the form, click the Save and Continue button at the bottom of the page.
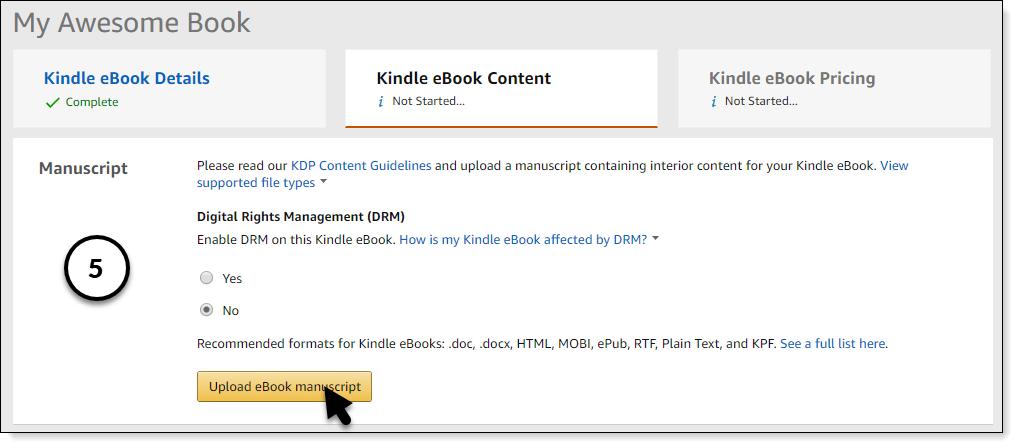
- At the top of the next page, select “No” to Digital Rights Management (DRM). Readers hate DRM and selecting “Yes” will kill your sales. As much as it sounds like a great idea, don’t do it. Click the Upload eBook Manuscript button.
- Next, upload a cover file (JPEG or TIFF).

- Now you need to wait a while for Amazon to process the files. When Amazon finishes processing the files, you can open the Online Previewer.
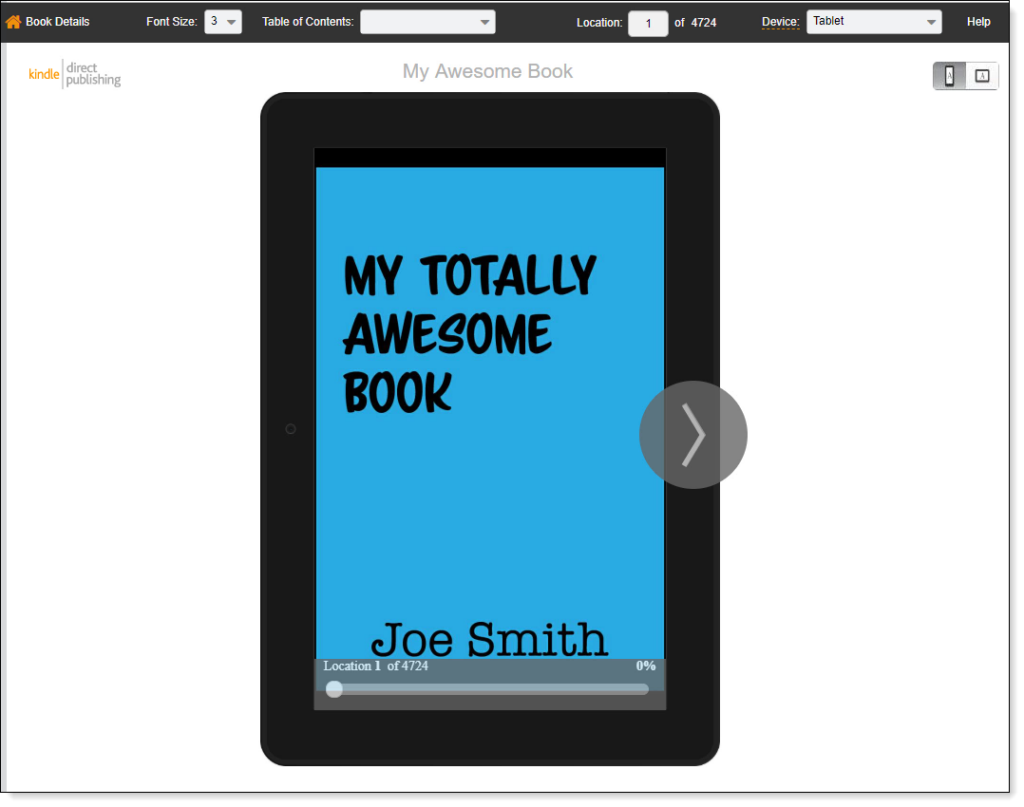
Check that the cover and content look as expected. This is the time to do yourself a favor and go through every page of the book to make sure it looks OK, and no formatting errors have crept in.
Make sure you check some pages at different font sizes to ensure reflow works OK too.
Be warned that eBook formatting for Kindle can be tricky, so don’t be surprised if a few errors creep in at this stage. If you have formatting problems, make notes, and get screenshots so you can send the book back to whoever formatted it for your for them to correct the errors.
- Once you’re happy with the preview, click Book Details in the top right of your browser to take you back to the content page.
- Click Save and Continue at the bottom of the page.
- On the next page, check the box if you want to enroll your book in KDP Select. There are plenty of articles online on the pros and cons of enrolling in KDP Select, so I encourage you to do your research. For this exercise, I will leave the box unchecked.
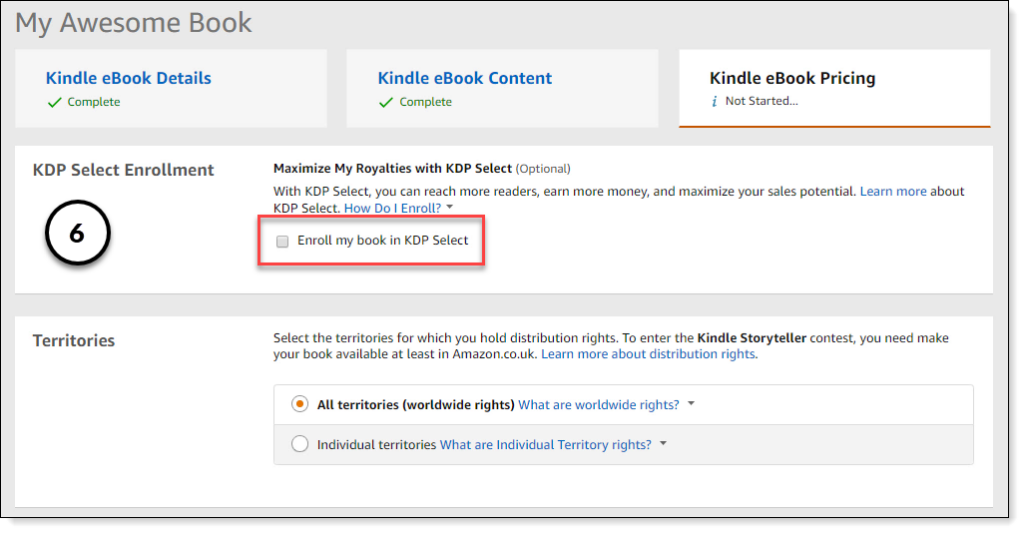
- Leave Territories alone and scroll down to set your pricing.
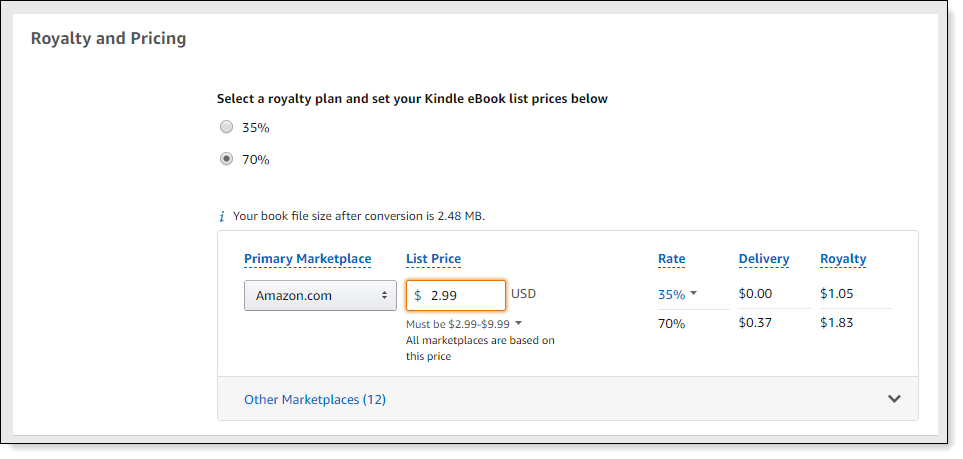
- For eBooks, always select 70% royalties. To qualify for 70% royalties, price your book between $2.99 and $9.99. I will enter $2.99. Amazon will give you an estimate of your book royalties per sale.
- Scroll down to the bottom of the page and click Publish Your Kindle Book. When you click the button, your book will publish, and you’re ready to go.
Amazon says it takes up to 72 hours for a book to publish, but waiting more than a day before your book is up for sale on all Amazon’s global sites is rare.
Amazon will send you an email once your book is available for sale. When you receive this email, there is one last thing you need to do—add a link from your author website to the published book.
Add a Book Link to Your Website
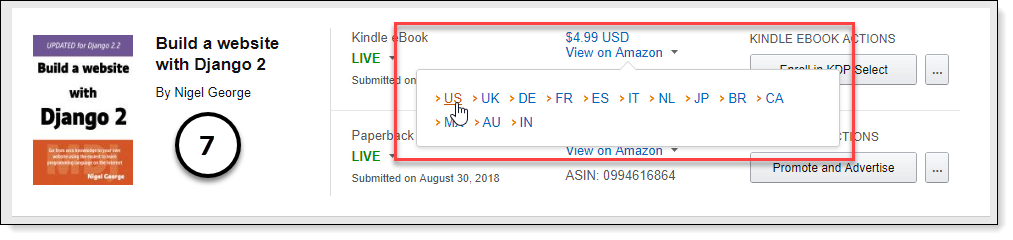
- Go back to your KDP bookshelf. In the screenshot, I am in my non-fiction publishing account as a book must be available for sale for the next step to work.
- Hover over “View on Amazon” next to the book you just published and click “US”.
- When Amazon opens your book page, copy the book URL from your browser’s address bar.

- Log in to your author website and open your home page for editing.
- Click the Buy on Amazon button. Paste the book URL into the button link. Make sure you delete the pound(#) sign. Click on the Enter icon.
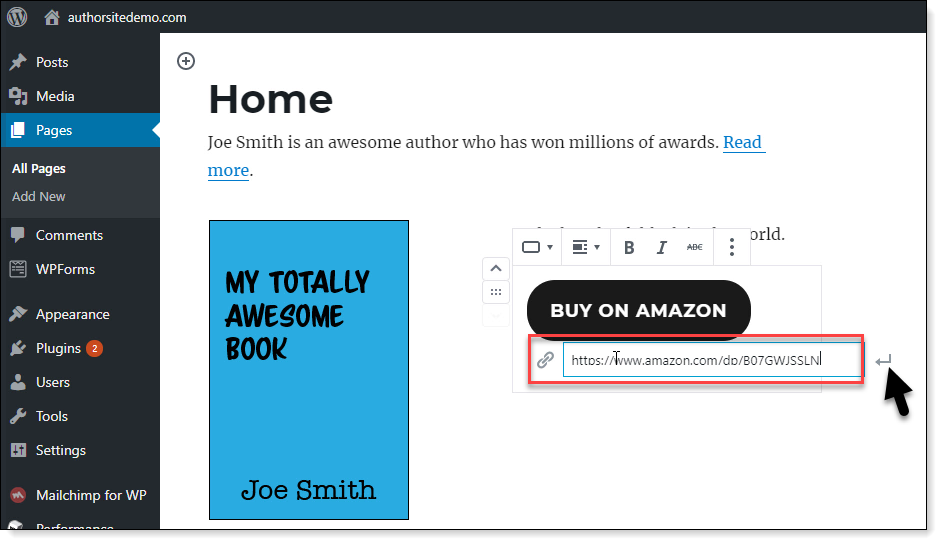
Once you update the page, when you click on the Buy on Amazon button, your new book page opens.
Well done! Now the book is published, all you have to do is write your next book :).
The next chapter should come as a great relief to those of you who are not confident with technology or don’t have a lot of time available to do the technical bits. In the next chapter, I will show you how to find professional freelancers that will do the jobs you don’t want to do.