Dated but OK content
The screen shots in this chapter are using the TwentyNineteen default WordPress template and 2019 version of plugins. The interface is slightly different now, but the process is still the same, so I’ve left this chapter intact for now.
In this chapter, we’re completing the second stage of your author website setup—setting up WordPress.
Set Up WordPress
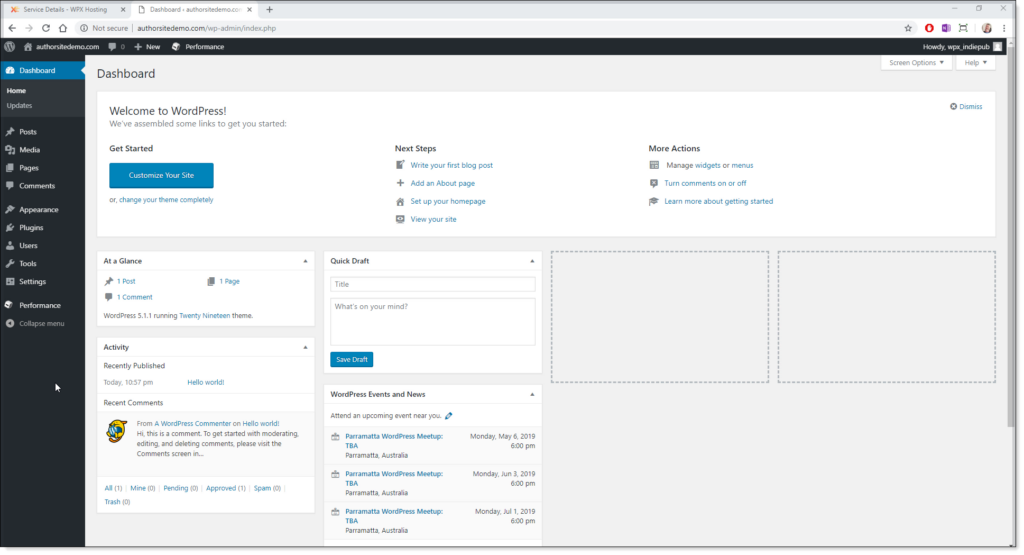
Once you log in to your WordPress site, your WordPress dashboard displays.
As you can see, the WordPress dashboard is quite busy. If you’re non-technical, you might feel somewhat uncomfortable right now. There is no need to be overwhelmed though as you will only use a small part of WordPress regularly.
It’s one of the few gripes I have with WordPress—because it tries to be everything to everybody, it has lots of extra stuff most of us will never use.
To finish the WordPress setup, we need to complete 3 tasks:
- Add a plugin for a contact form and a plugin for SSL security
- Add some draft pages (You’ll add the content in Chapter 10); and
- Create the menu for the site.
We also need to change some settings as we go along. None of these tasks are difficult, and the whole process should not take more than an hour.
Once these tasks are complete, the only parts of WordPress, you will need to interact with are:
- Posts—where you add blog content, new stories and news; and
- Pages—which you only update when you have new books or need to edit your profile.
- To start, we will change some settings. Click on Settings in the left menu, and then select General.
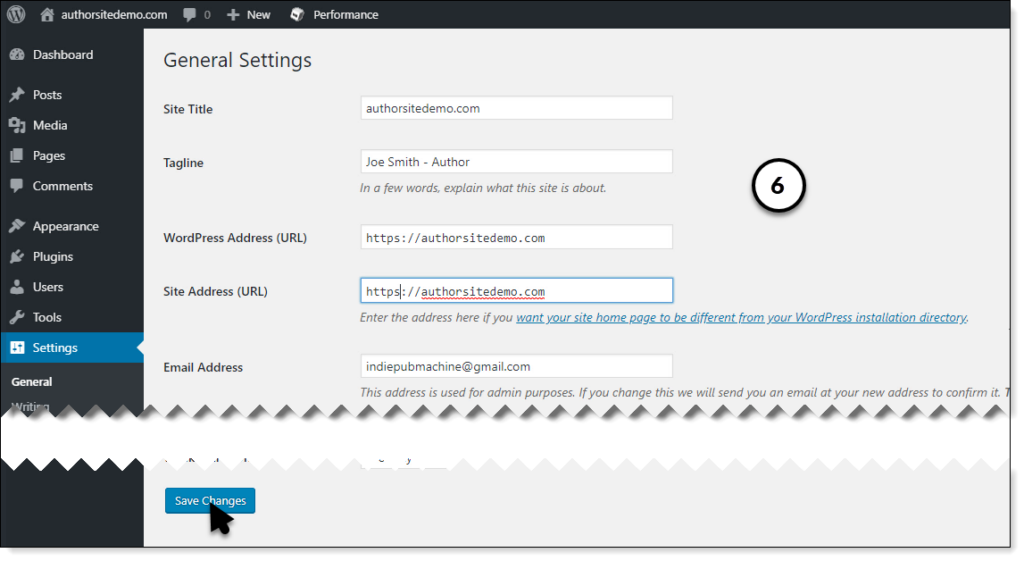
- Change the tagline to “[Your Name] – Author”. You can change the tagline to whatever you want, but this is a common default.
- Next, change the WordPress Address and Site Address from HTTP to HTTPS. The “S” on the end makes your URL secure—any traffic directed to your site will now use the security certificate you installed.
- Scroll down and click Save Changes.
At this point, your site will break and show a big scary message. This is because you logged in on an insecure HTTP link and have set your site to use only secure HTTPS links.
This is normal—close the browser window and go back to your WPX dashboard.
Click your new domain name again to reopen your WordPress site, scroll down to the bottom of the page, and log in to your WordPress site again.
You may still get security warning messages, but that’s OK—we’re about to install a plugin that will make sure that all traffic to your site is secure and you get no more warnings.
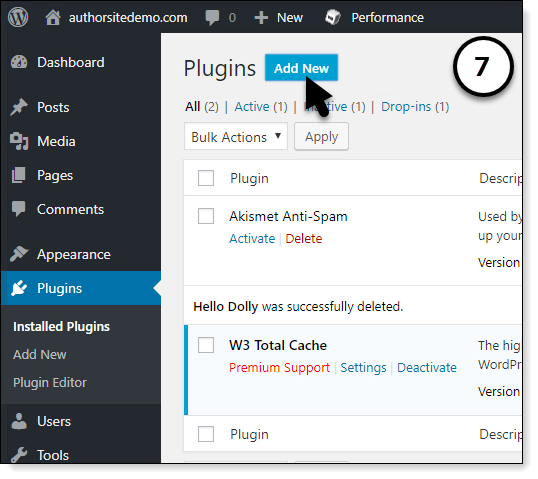
- Click on Plugins in the left menu and click the Add New button at the top of your screen.
- Search for “Really Simple SSL”
- When the Really Simple SSL tile appears, click the Install Now button. Once it is installed, click Activate to activate the plugin.

When the next screen opens, activate SSL by clicking the Go ahead, activate SSL button. It’s safe to ignore the messages—your site is new, and none of these recommendations apply.
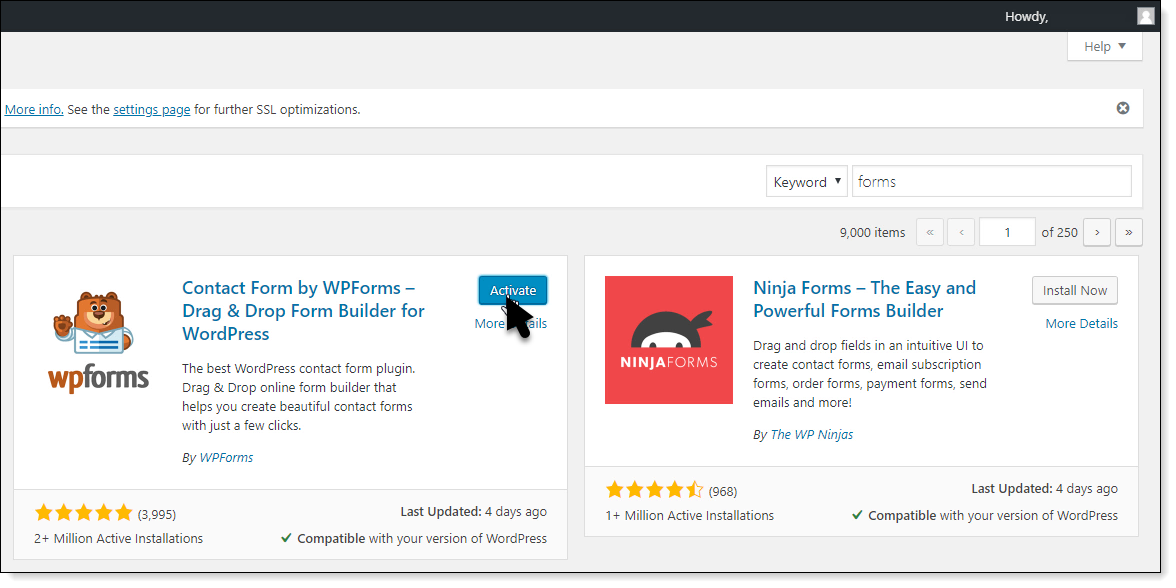
- While we’re still in plugins, we will add a plugin for your contact form. Click Add New.
- Search for “WPForms” and install the “Contact Form by WPForms” plugin.
- Activate the plugin and the WPForms setup screen opens.
- Click Create Your First Form.
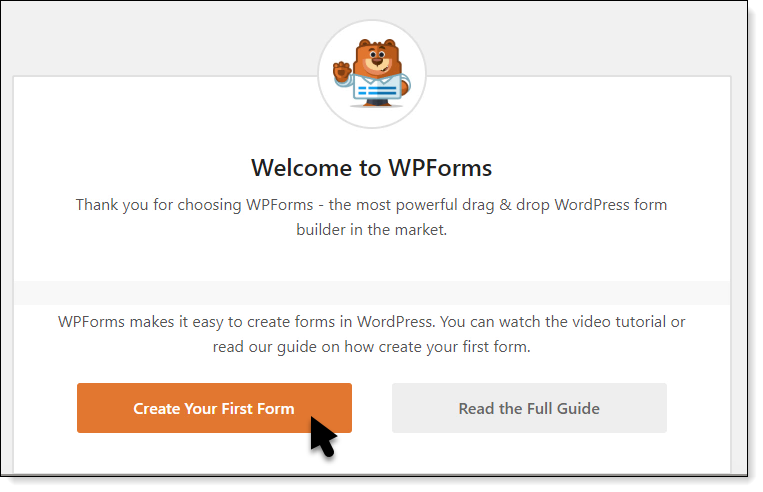
- Click Create a Simple Contact Form.

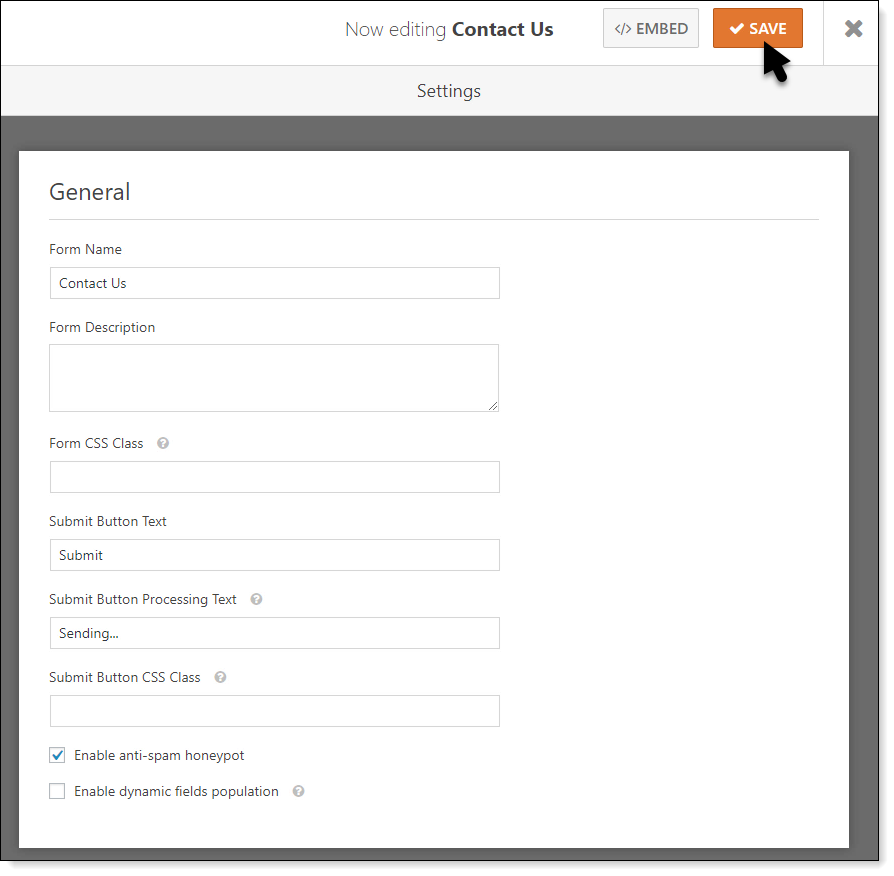
- Click on the form title in the edit screen and change Form Name to “Contact Us”.
- Click SAVE in the top right of your browser.
- Click on EMBED to show the shortcode for the form. Don’t worry too much about what shortcodes are right now—they’re a special script that will embed something in a WordPress page or post.
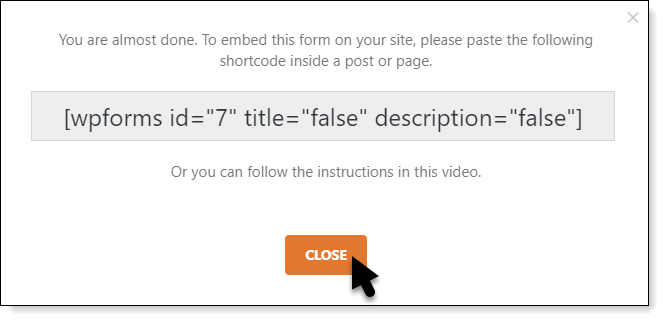
You need to copy the shortcode and save it somewhere safe—you will need it soon.
Once you have copied the shortcode, close the pop-up and close the form window to go back to the WordPress dashboard.
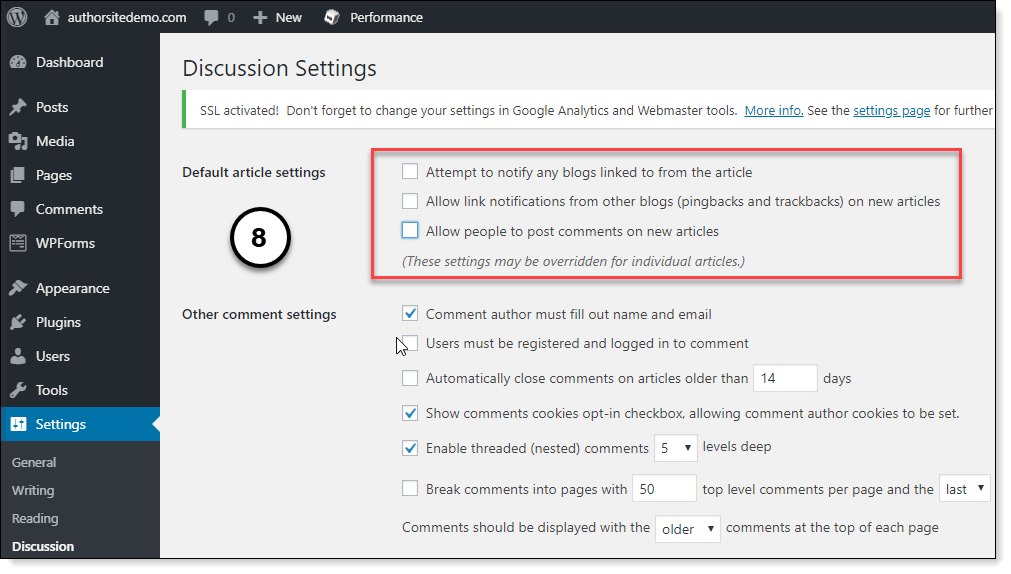
- Now we have a couple more settings to change. Click on Settings->Discussion. We will turn off user comments on your author website. WordPress’ native comments are an open invitation for trolls and endless spam messages. It’s far better to keep your reader communications either by email or in your social media groups.
Make sure the first three checkboxes are unchecked like in the screenshot.
When you’ve finished, scroll down and click Save Changes.
Now click Permalinks and check that the permalink is set to “Post name”. This is the default in WordPress 5, but it helps to check because permalinks are difficult to change later.
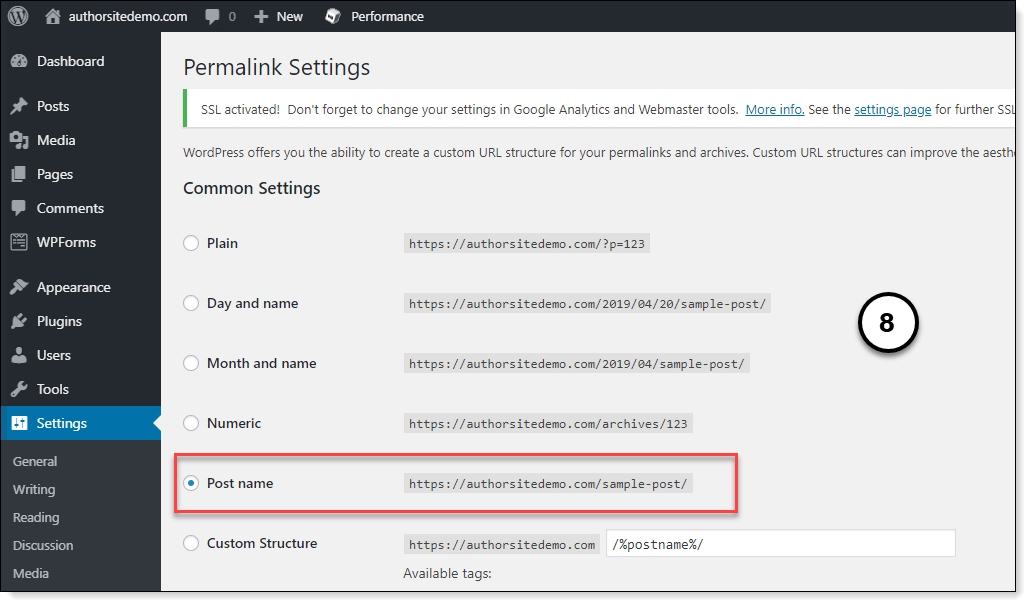
If you have to change the setting, make sure you click Save Changes.
Add Pages
Now we will add some pages to your site. In this chapter, we will only add the page titles and placeholder content. We will add the content in the next chapter.
The reason we add placeholders first is so we can set up a menu. You can’t create a menu without having pages to assign to each menu item.
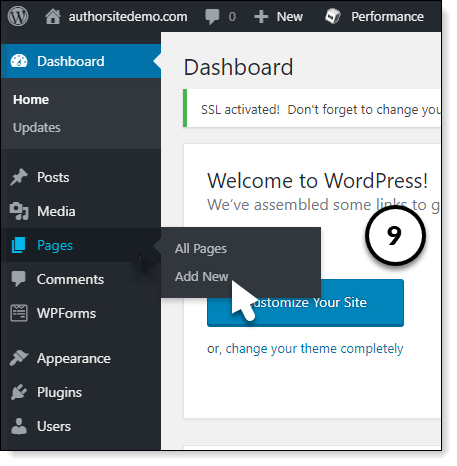
- Click on Pages->Add New.
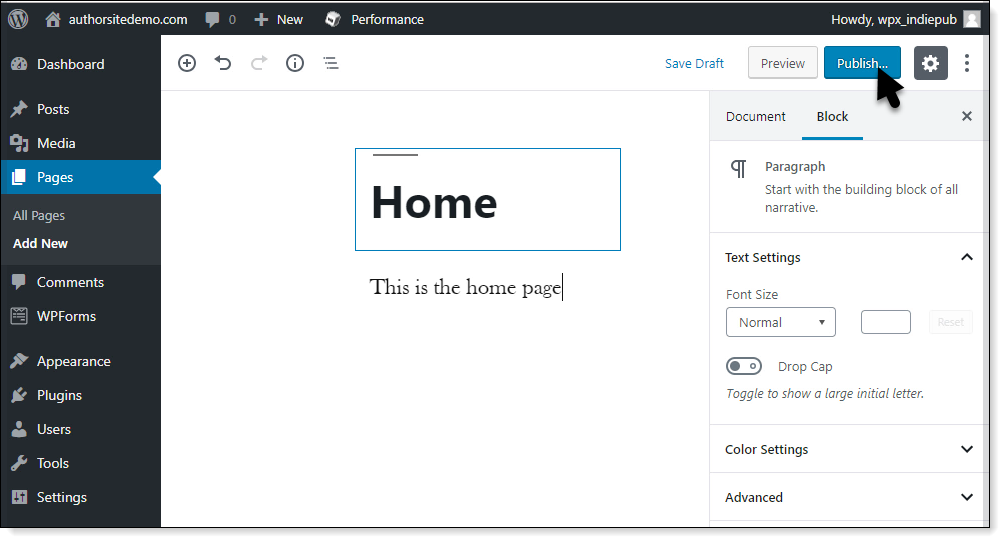
- Enter “Home” as the title. Add some placeholder text in the page body. Click Publish.
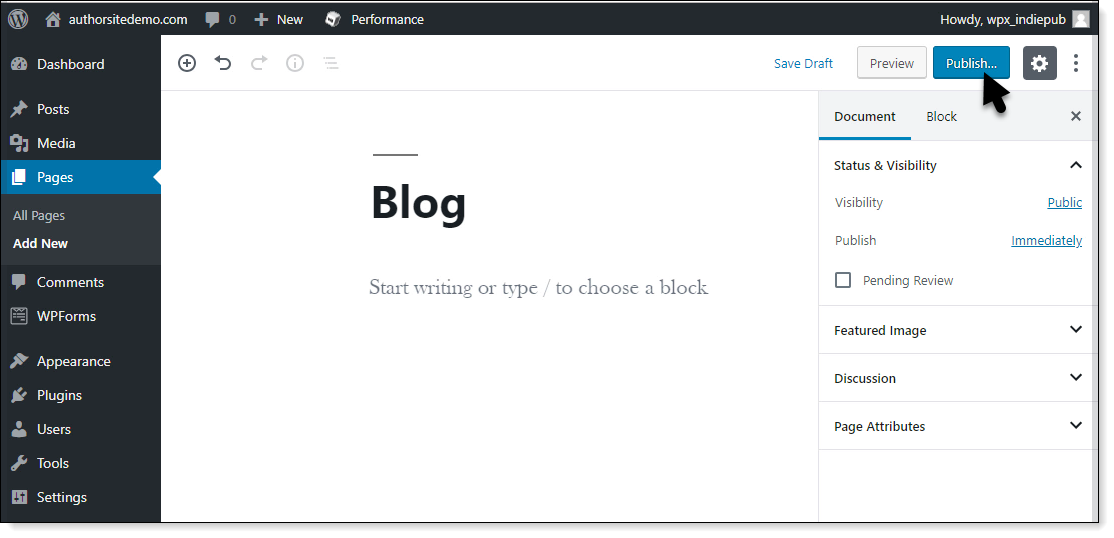
- Create another new page. Enter “Blog” as the title. You don’t have to enter any placeholder text for this page—WordPress manages blog pages for you. Click Publish.
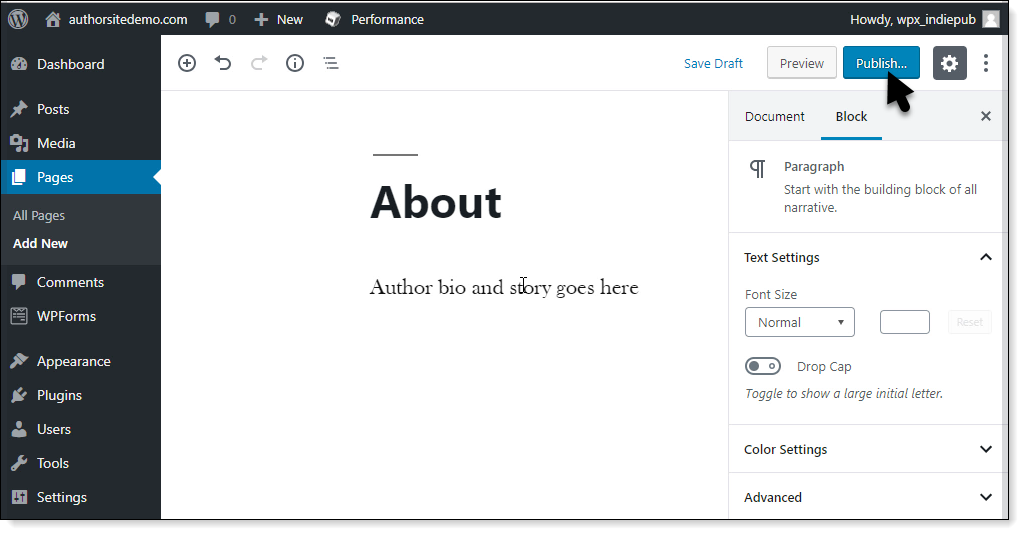
- Repeat this process to create an “About” page. Click Publish.
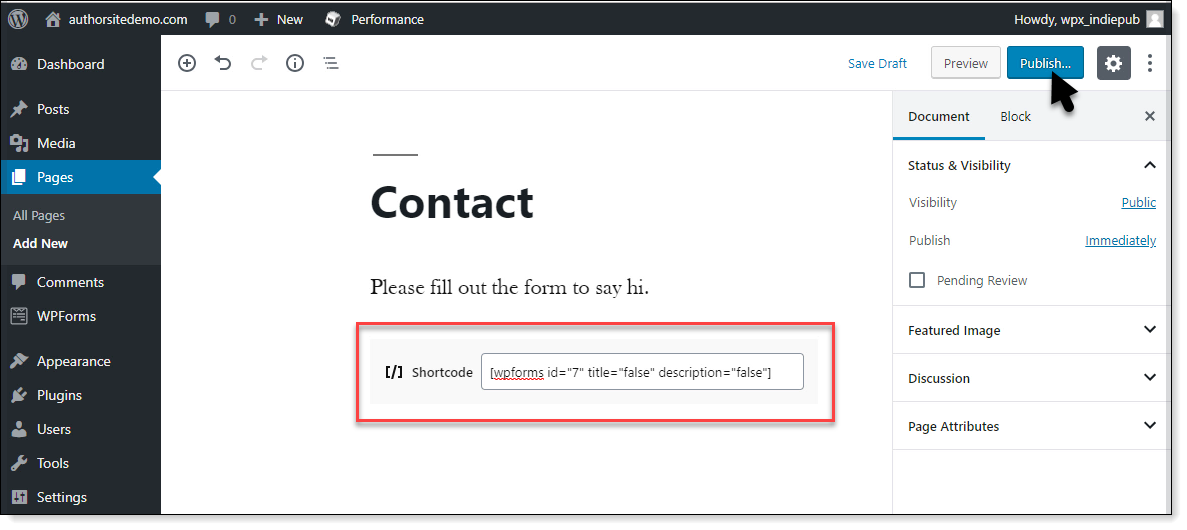
- Finally, create your “Contact” page. Once you have added some intro text, click on the plus icon (+) and select “Shortcode” to add the contact form to the page. Shortcodes are under the widgets category. This is where that shortcode you saved a little while ago goes.
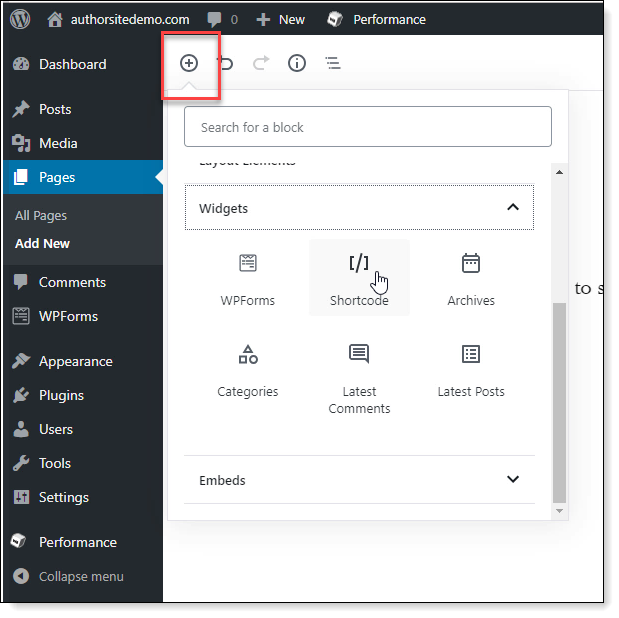
- Select the shortcode widget and paste the shortcode you copied. Click Publish.
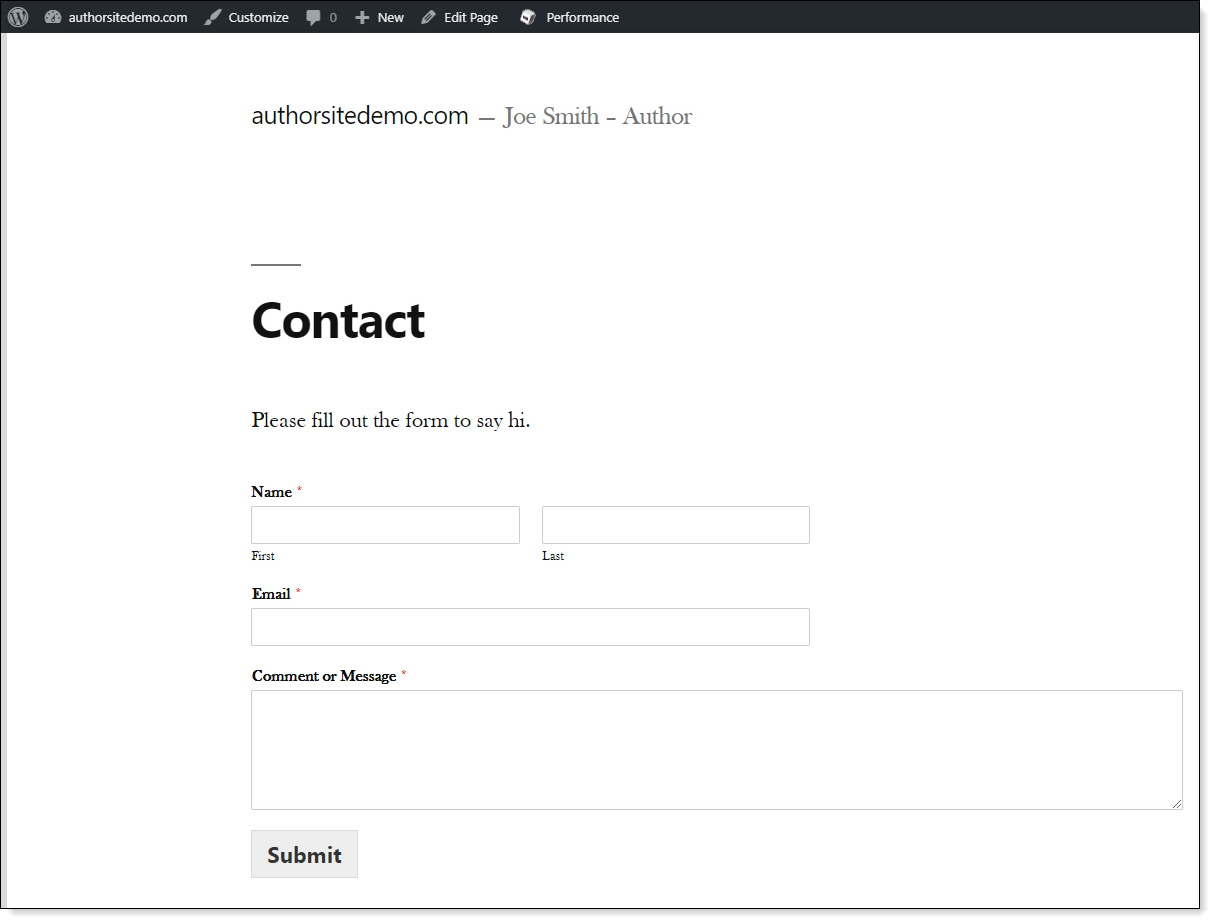
To test out if your new form works, click Preview. Your browser should display the contact form the plugin created for you.
Set up Menu and Navigation
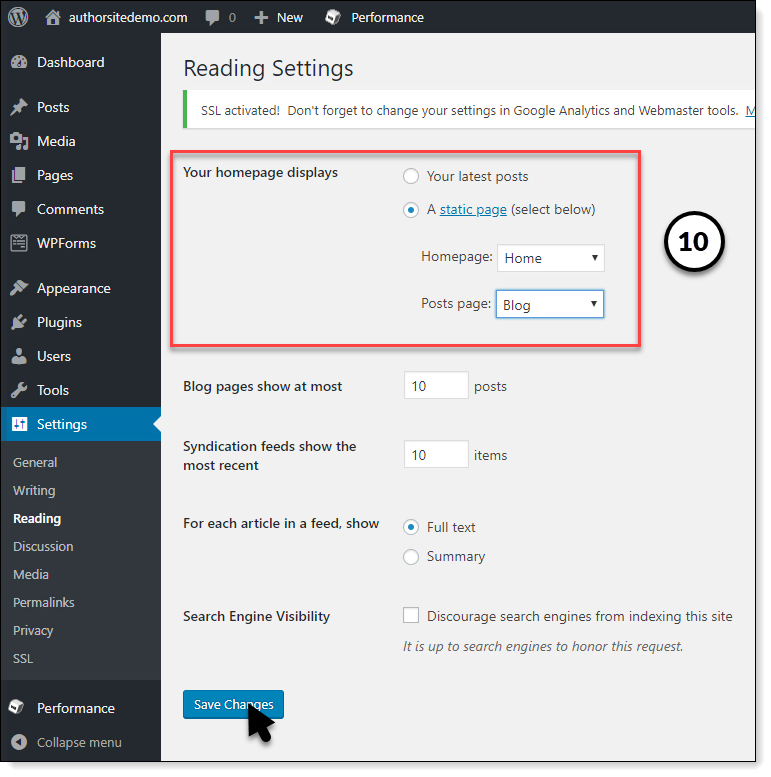
- Go back to the dashboard and select Settings->Reading.
- Set “Your homepage displays” to “A static page”. Set “Home” as your homepage, and “Blog” as your posts page.
- Click Save Changes.
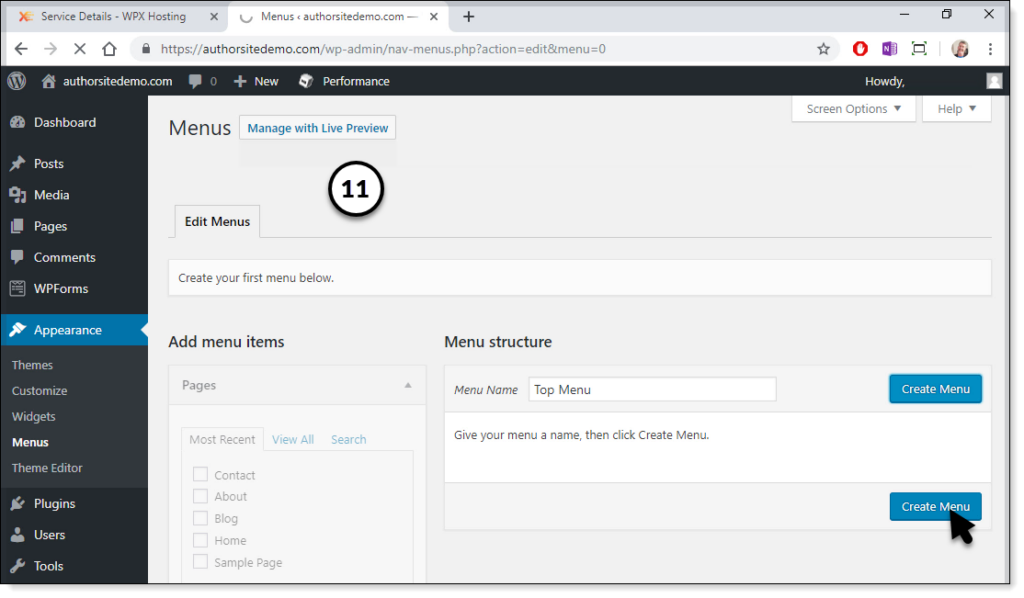
- Click Appearance->Menus.
- Enter “Top Menu” in the menu name text box and click create menu.
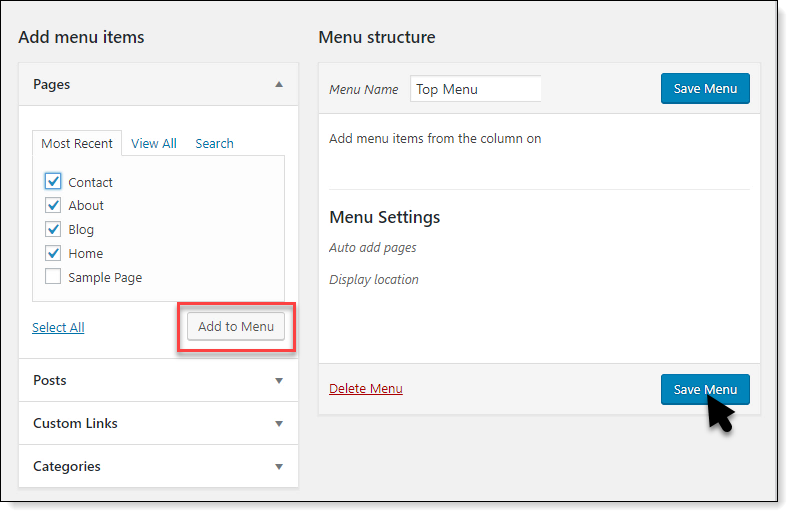
- Now check the four pages you just created in the “Pages” tile and click Add to Menu.
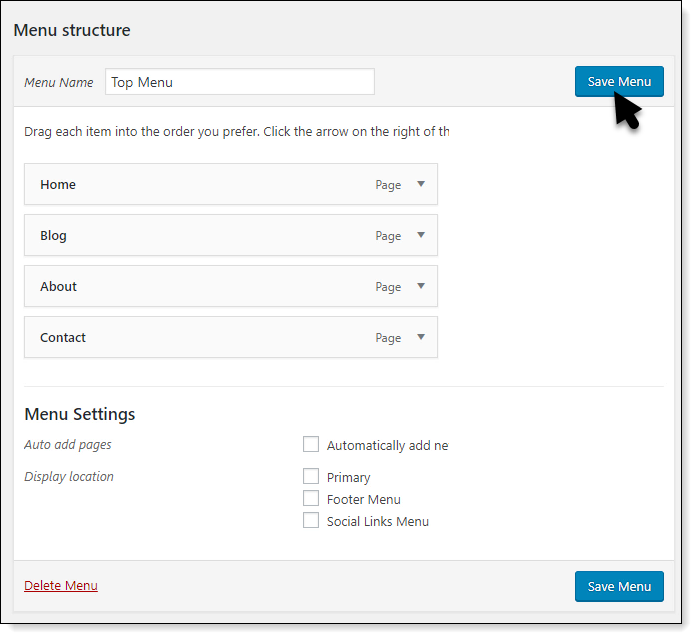
- You can rearrange the menu items to suit your tastes. I’m arranging them into a standard layout. Click Save Menu when you are finished.
- To add the new menu to your site, click on Appearance again, but this time click on Customize. On the customization menu, click Menus.
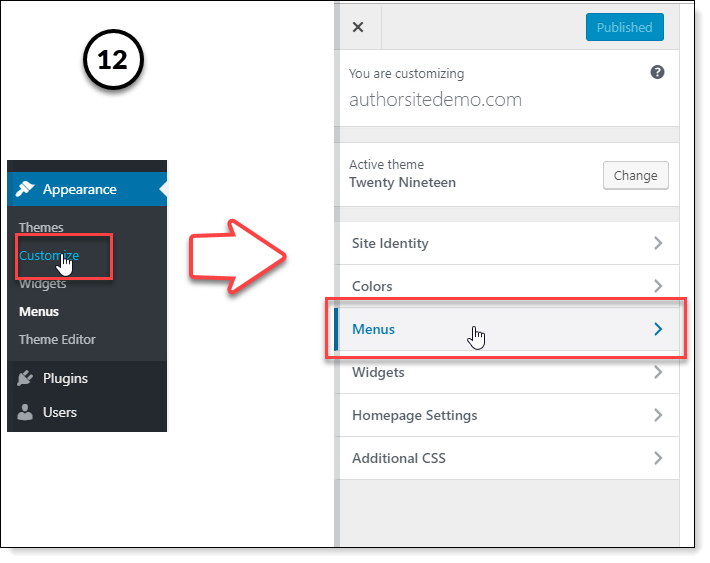
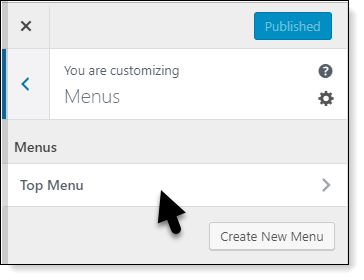
- Select “Top Menu”.
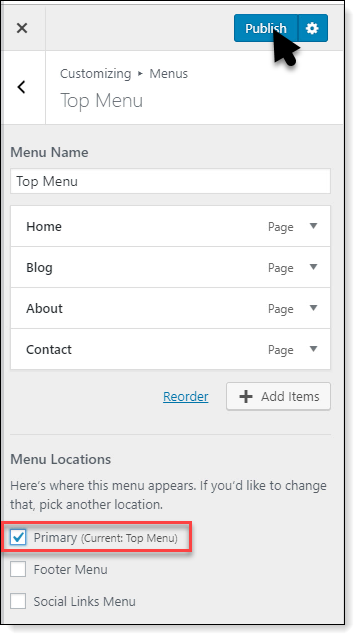
- Check the “Primary” checkbox. Click Publish and close the customization menu.
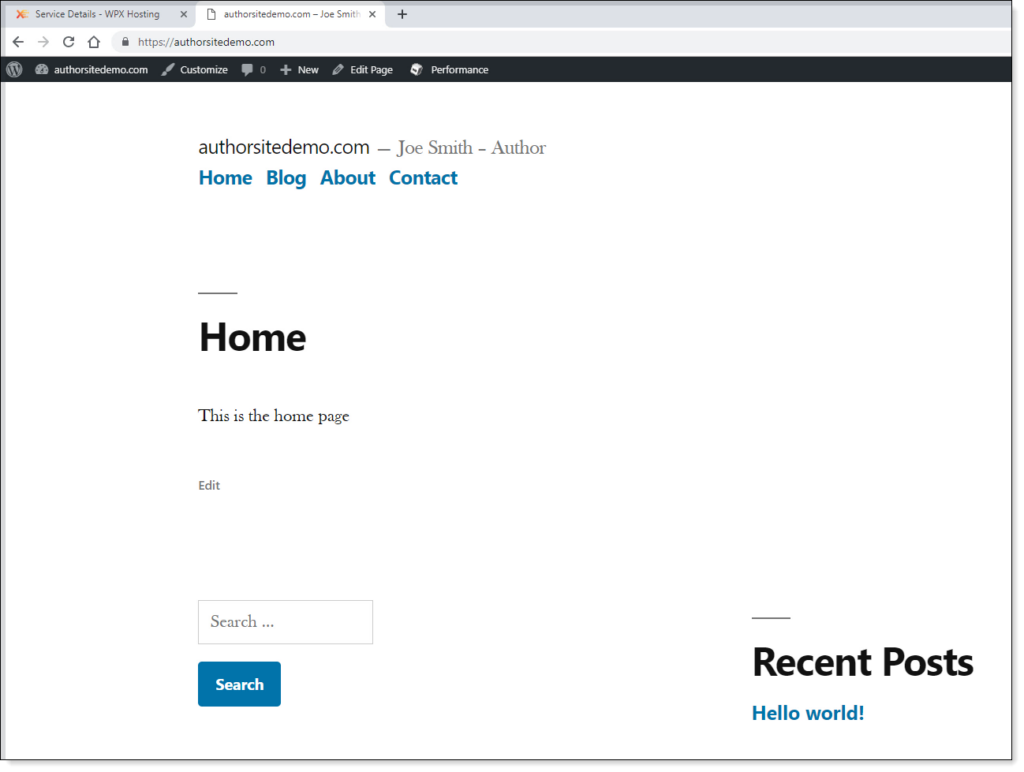
Now, if you click the home icon in the top left of your browser, the configured site will display. Take some time to explore the home page. Try each of the menu items in the top menu to see how your new pages fit in the layout, and how the menu you created helps with navigation.
And before you say it, yes, the default WordPress template is awful. Thankfully, changing WordPress templates is easy, and I will show you how in the next chapter.
The reason we don’t fiddle with templates now is that you can’t see how a template works with your content until you have a decent amount of content on the site.
Playing with templates can also be an enormous time sink, so it’s much better to get the content sorted before Creative Brain takes over and you spend 7 hours testing out color schemes.
That’s it for this chapter. Most of the boring tick this, check that, install the other process is complete now—in the next chapter we will write some content to replace the placeholders we created.